So, I think I’ve mentioned before that I’m not a terribly good typist. This fact, however, does not stop me from hitting very many keys in a short span of time. Because of this, I use my Backspace key a lot to correct my million and one typos. Now, when I’m working in a Word document, for instance, this is fine. But when I’m online filling out a form, sending a Tweet, or posting this blog, I have to be very careful about where my cursor is and that I’m deleting text, not something else.
See, in your web browser, whether you’re using Firefox, Chrome, Internet Explorer, or Microsoft’s new browser, Edge, that comes with Windows 10, the Backspace key is a shortcut. If you have viewed more than one webpage inside the same tab, and you want to return to the previous page, most of the time, people use the back arrow located at the top left.

However, typing the Backspace key provides the same result, returning you to the previous page. Now, loving my keyboard shortcuts the way I do, and with all the time I spend online, you would think I’d love this shortcut. Truth is I despise it. Because when I’m typing (poorly), if I’m not careful, I don’t delete my typos, I leave the page I’m typing on.
In fact, I just did this last night. I was composing a terribly clever DM (Direct Message) on Twitter, and somehow I’d moved my cursor without realizing it, so when I hit backspace to fix a typo, I lost my clever message when I went back to the page I’d been on before Twitter. At this point, I may have lost my temper a tiny bit, and politely asked my husband if he knew how to disable this particular feature, because I knew that it could be done, but I could not remember how. So he looked up how to disable the shortcut in Firefox while I looked up how to do the same in Chrome. (Sadly, there is no way to turn this off in Internet Explorer or Edge.)
Firefox
First off, a warning if you’re going to attempt to do this in Firefox. You need to go into the configuration of the browser, so if you turn on, off, or change something here, it’s fairly dramatic, so you want to make certain that you know what you’re doing. That said, in this particular instance, it’s pretty easy to know what you’re doing.
Open a new tab and in the address bar where you would usually enter a website url, type in about:config and hit Enter.

You are now about to configure the browser in a very specific way. To turn off the Backspace key as a shortcut for the back arrow, type backspace in the search box at the top and then hit Enter.

This should net only one result, so right click on the result. You should now have a menu. Left click on Modify.

A box pops up allowing you to change the integer value. To turn off backspace, change this from 0 to 2.

The Value should now read 2, and the Status should have changed from default to user set.

Chrome
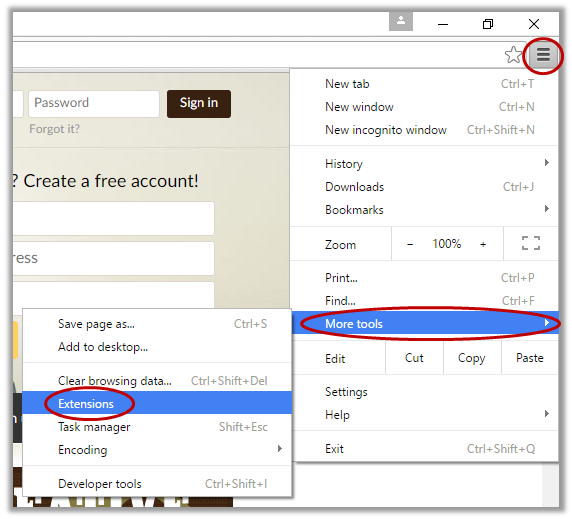
If you’re using the Google Chrome browser, Backspace is disabled by adding a free extension. To do this, go up to the menu in the top right (three horizontal lines), move your mouse down to More tools, which opens another list, from which you will click on Extensions.
At the bottom of the next page (depending on how many extensions you already have, you might need to scroll down a little), click on Get more extensions.

In the search box at the top left, search for backspace and then type Enter.

There are several extensions that will stop the backspace key from returning you to the previous page. (I use BackStop.) Simply click on ADD TO CHROME for the one you want. As soon as you close and reopen Chrome, the extension will be working.

Shelia